

Screen recording is something that you can get on your mobile phone. But if you want to record the screen of your PC, you can do it with the help of software. There is plenty of screen recording software available on the web. Furthermore, you can save the video recording as MP4, MOV, or GIF. And not just the screen but this software are equally good at recording live streams.
So even if you are playing video games, you will have the option to record them. Afterward, you can share it on any social platform you want. Uploading and sharing screen recordings of video games on YouTube is a trending thing. A lot of gamers do so along with some roasting.
So if you are interested in doing so, go to recorder.iobit.com and have your screen recorder for free. This software allows you to record any screen area. The most amazing thing is that you will get unlimited recording time. Therefore, you can start the recorder when you start playing the game. Thus, you will have the option to cut the clip you want.
In addition to this, the use is not limited. You can use it for educational purposes, for your work, gaming, and also for personal use.
Recording on Windows computer or Mac

Whether you have a Windows PC or Mac, they have built-in software for this purpose. In Windows 10 operating system, you will get the feature of “Game bar” that saves videos in an mp4 file. But you have to set it up first.
To do so, go to Settings. There you will see the option of Gaming. Click on “Game Bar”, you will see the switch for recording game clips, turn it on. Now you can take screenshots or do broadcasting using Game Bar. If you are using your Xbox, you can connect its controller with your computer. Thus, you will be able to control it with the help of an Xbox controller.
Step by step guide

Once you activate the screen recording option in the “Game Bar”, it is activated. You have to open the application that you want to record. It can do recording except for file explorer, weather, and windows desktop. But you are working on recording your video game.
- So open up your game and press “Win+G”. A pop-up Game Bar will open. You will see several widgets on this bar. This will allow you to capture screenshots, record audio or videos, and also broadcast the activity.
- Now click on the “start recording” option. If you often have to record clips of your game, you can press “Win+Alt+R”. This will start recording the screen.
- Now you can play the game and the recording will be taking place. At this time, there will be a floating bar on the screen. You will see controlling options on this floating bar.
- You can record all you want and when you wish to stop it, click on the stop button.
- The recording will end now and you will see its notification. It will also tell you that the recorded video is saved. You can click on it and go to the location where the recording is saved. Here, you can view the file, edit it or upload it wherever you want.
Recording on Mac
If you are using Mac, it also has a feature that allows screen recording. If you want to record the gaming clip, follow these steps.
- Open the application or game and press “Shift+Command+5”. This will open the recording tool of Mac OS.
- The bottom toolbar will provide you with various options. You can either capture the whole screen or a part of the screen. Or you can record a selected window. It’s all your choice.
- You will also see the “Options” option on the toolbar. When you click on it, you will see various options. Here, you can choose the option of selecting the recording location and countdown timer. With the help of the countdown timer, you can set a preset time after which the tool will automatically start capturing the screen. Furthermore, you will also see the option of voice recording. So while you are playing a live game and also talking with other team members, you can record all this conversation too.
- But most importantly, you will get to see 2 options. One is “record entire screen” which allows you to record everything going on. Then there is another option of “record selected portion” that allows you to capture only a limited portion.
- Afterward, the screen capture is taking place and during this process, you will see a button. If you look at the menu bar, you will see this button on the top.
- If you wish to stop the recording, clock on the control button. This will stop recording
and save the recorded file. Unlike the windows bar, Mac OS will add a thumbnail to your pc. Thus, if you wish to open the file, click on this button. The recorded video will automatically play through the default player.
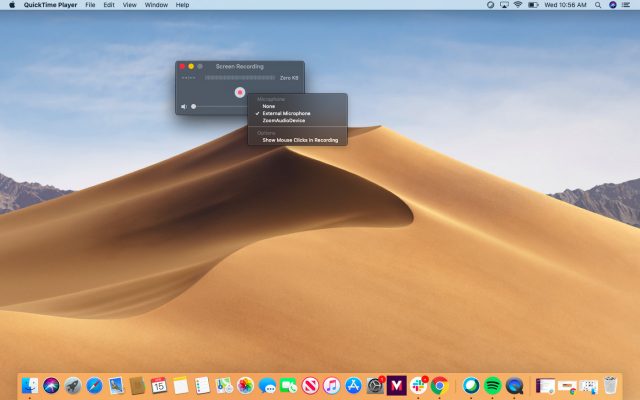
QuickTime on Mac
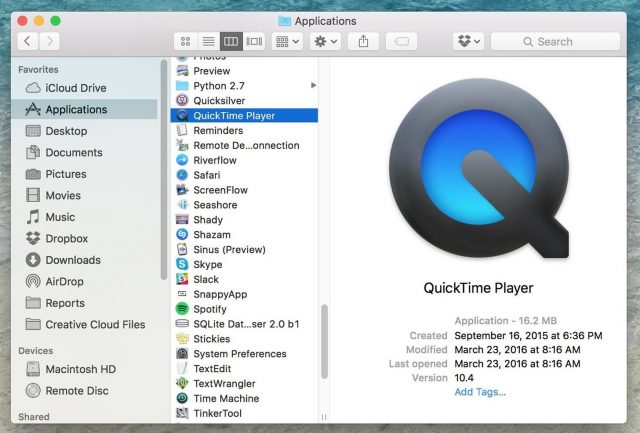
If you have Mac, there is another option of QuickTime. All you have to do is to open this QuickTime and click on the “File” option on the top bar. Afterward, you will see the option of “New Screen Recording” under File.
You can click on this option and allows it to have access to the screen. This permission is only needed for one time. Once you allow it, it won’t be needed the next time. So you don’t have to do much but only to click on-screen recording and it will record the ongoing display on your computer. Thus, you can use it as another tool on your Mac pc.


